StatCounter

Thursday, September 26, 2013

Book Lockets and Hinged Boxes


A finished book with mica

What I'm working on now

Thursday, June 13, 2013

Home Sweet Home; Back from Milwaukee

The lilacs were in full bloom before I left.
Glorious spring!
I have returned from The Bead and Button Show in Milwaukee, and am tired and happy.  I taught a 4-day Master Class on rings in PMC Sterling.  The class had 22 students, and with erin meharg's excellent assistance, we fired 99 rings (all PMC Sterling) with 100% success (no sintering problems).  Of those 99 rings, 92 shrank as predicted; 3 sizes from fresh to fired (using the technique I use and teach for refining, sanding, etc).  Most of the 7 that were smaller than predicted were so because the makers varied their technique; in other words there was a reasonable explanation. 
In addition to diamond rings, students made rings varied from these samples.


Of the 99 rings, 59 had diamonds fired in place.  The diamonds behaved perfectly and were very popular!  We also used 24K gold foil to keum-boo the sterling rings (no depletion gilding).
Erin's lovely diamond ring.
All in all it was a great trip.  I saw so many people I haven't seen in a long time and once again celebrated my B'Day at the show. 

Me and Marlene Vail 

Hard at work in the kiln room.

I'll be back next year for a new Master Class on making simpler hinges.
I have a couple of places left in my upcoming July classes on these topics; Hinged Book Charms and Sterling Rings.  Also in the Treasures bracelet Class.

Sunday, April 21, 2013

More Hinged Book Charms


Making these little charms lessens the pressure of perfectionism; my goal is to make many expressions of an idea, not one perfect exemplar. They feature a relatively large hinge for such a tiny object (think of the spine of a book relative to its size) making it much more approachable than a hinge on a ring, for example
Working small saves material and money. That in turn frees me to be less focused on how much clay I’m using so I can explore these ideas through repetition and variation, therefore perfecting my technique. I’m using PMC Sterling, the perfect choice for pieces that require strength, like hinges or pieced work.

This time around I wanted to try a spiral bound book and a book with a heavily pierced front.


I could have drilled the holes for the spiral binding after firing. Ordinarily that’s just what I’d do, but I wanted to see just how evenly PMC Sterling would shrink.  You would not be able to pre drill like this with original bronze, for example.  The holes would not line up after firing.  In general, I do drill any holes that will need to line up, like holes for rivets, after firing, but this seemed like a worthwhile test.


In the original plan, the loops along the bottom edge were to hold a tiny peg (pictured) that would be attached by a chain, to keep the book closed.  After firing it seemed unnecessary, so I used the loops to hold balled up wires.


The fired, unfinished spiral book with a test spiraled wire. The holes lined up perfectly demonstrating that the PMC Sterling shrank evenly in the kiln. I decided to add a flame patina-ed copper “page” and so had to go up in size on the wire spiral.  A larger diameter wire accommodated another page nicely.


Hung from the top, this spiral style book works nicely as a necklace.  The bail here is the same thing I’m using as a hinge pin on the other book charms.


I riveted a little keum-boo piece to the back side of the copper page. Next time I’ll use a larger diameter spiral and add more pages.


I also finished a book/box charm I’ve been bringing along with this group. It closes securely with a purse clasp and holds a bronze spiral on a chain.


Thursday, March 14, 2013

Simpler Hinges in PMC Sterling


Making tiny hinged book charms gives me a way to explore PMC Sterling through less elaborate construction than boxes or box pendants.
Although book charms are tiny, (fired they are less than an inch tall), like any other hinge they require meticulous engineering.
Because I am investing less time (and material) I am willing to take more chances and therefore I’m likely to learn more about the clay in a shorter period.

PMC Sterling is still a relatively new material and I continue to explore it in that spirit.  Its working qualities are quite remarkable.  It carves beautifully.  It handles beautifully and has a longer open working time than any other silver clay.  With the exception of firing, everything about it is easier.
Two-stage firing will always be a drawback simply because it’s an extra step, takes extra time and is dirty work because it involves carbon.  I still feel strongly that PMC Sterling’s benefits outweigh its drawbacks. Although various artists are experimenting with single stage firing I have had great success with the two-stage so I’ll stick to what works for me.

Because they require precision, hinges are a good way to explore possible distortion during firing.  PMC Plus and 3 do sometimes distort during firing.  However, since they’re fine silver and more malleable, it’s relatively easy to correct the distortion with nylon jawed pliers or wooden dowels and a rawhide mallet.  The down side of this malleability is that hinges made from fine silver are more easily pushed around, crushed, jammed up, etc.

Hinges made with PMC Sterling are more challenging to realign once they are fired because the material is so much harder.  However, once they are realigned they are much stronger and will withstand wear and tear better than fine silver hinges.

The fact that the knuckles are in line after firing, or not so out of line that they can’t be nudged into line, suggests that all the variables are behaving as I would expect. They are kiln temperature, firing schedule, carbon (type, age, amount used), type of container, and the number of pieces fired together. 
Note: I do not fire hinged pieces assembled. I put the top and bottom (or the front and back) next to each other in the kiln.  An assembled hinge, like an assembled box, will fuse together unless it’s dusted with a fine powder that won’t burn off in the kiln.  This could be shaved or scraped off kiln shelf material, or graphite; I’m experimenting with other possibilities now.  

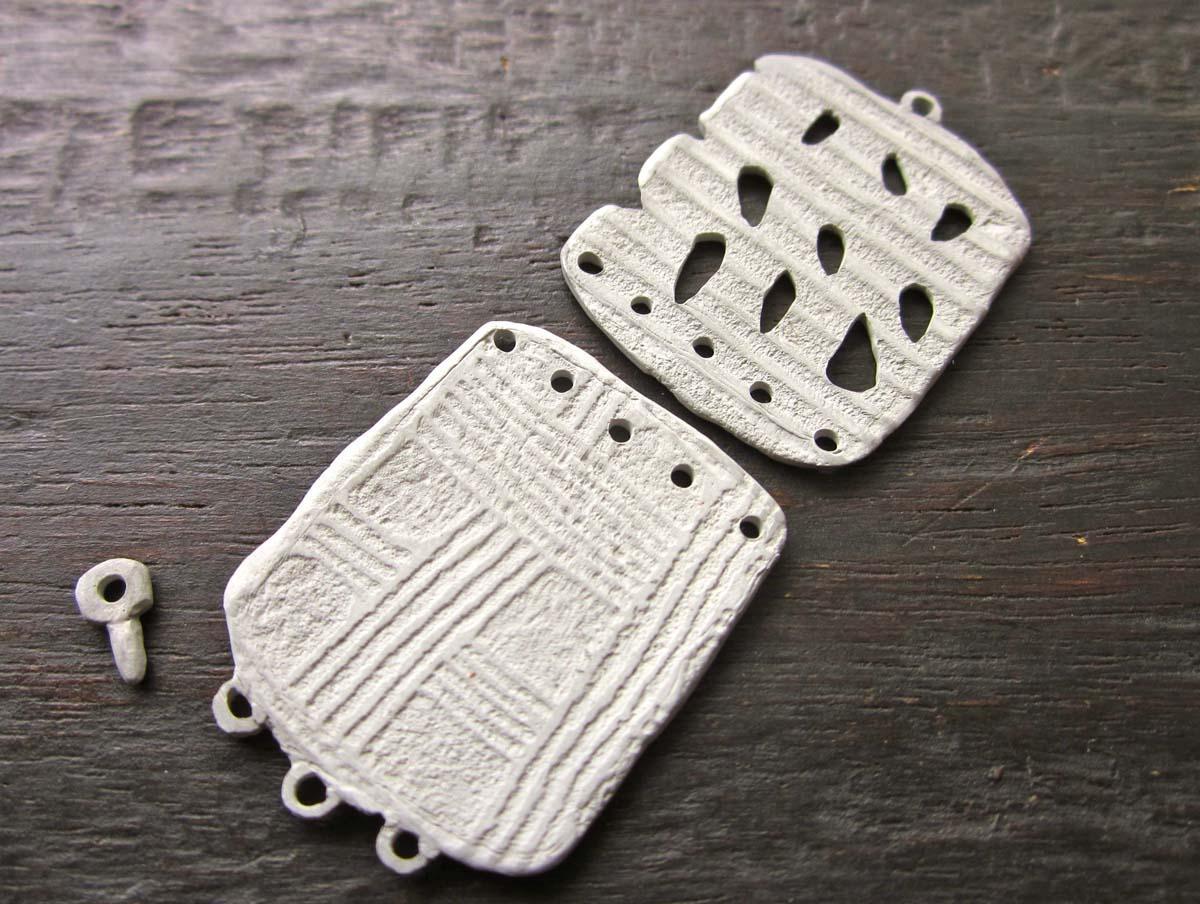
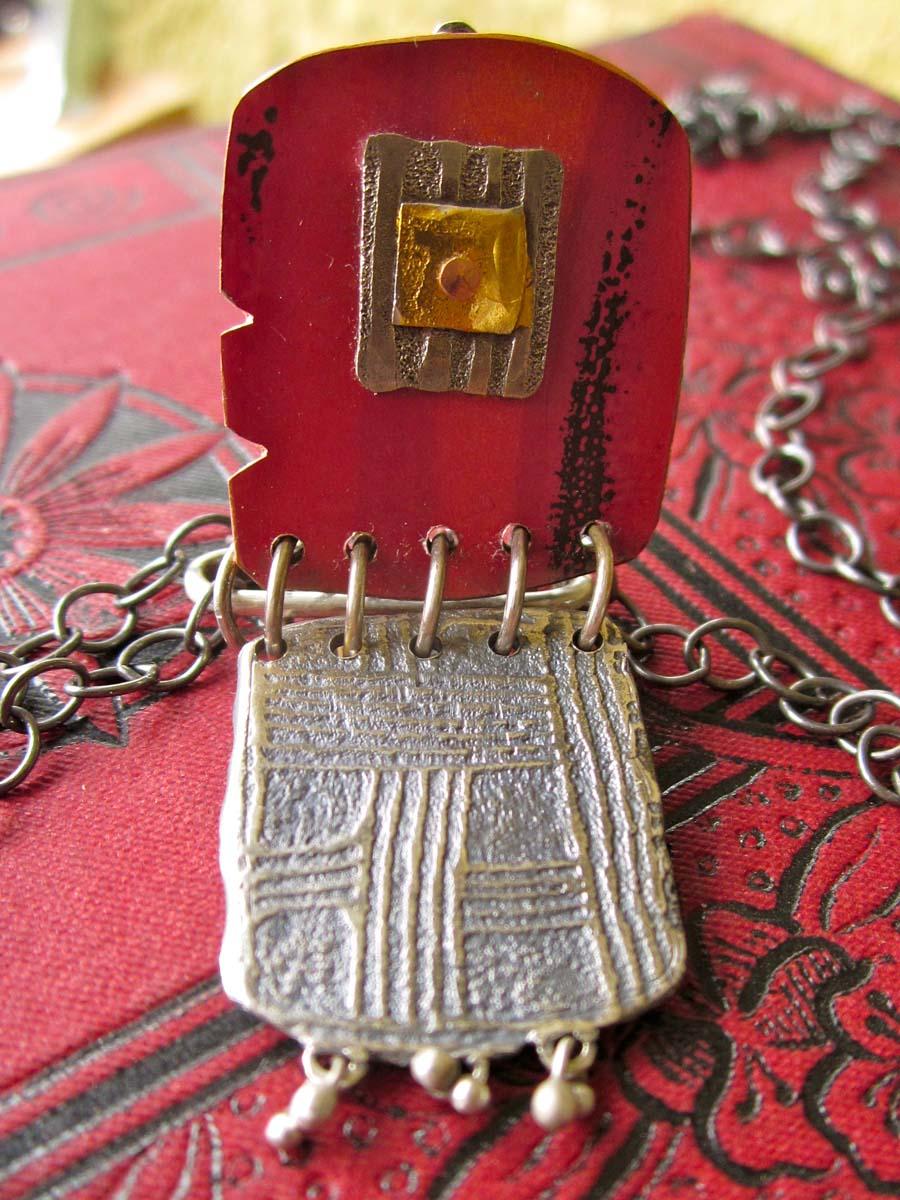
These are three book charms from a series I'm working on.  Each one is slightly different.


I texture and cut the parts from fresh clay, cutting any windows out when the clay has set up.  I 
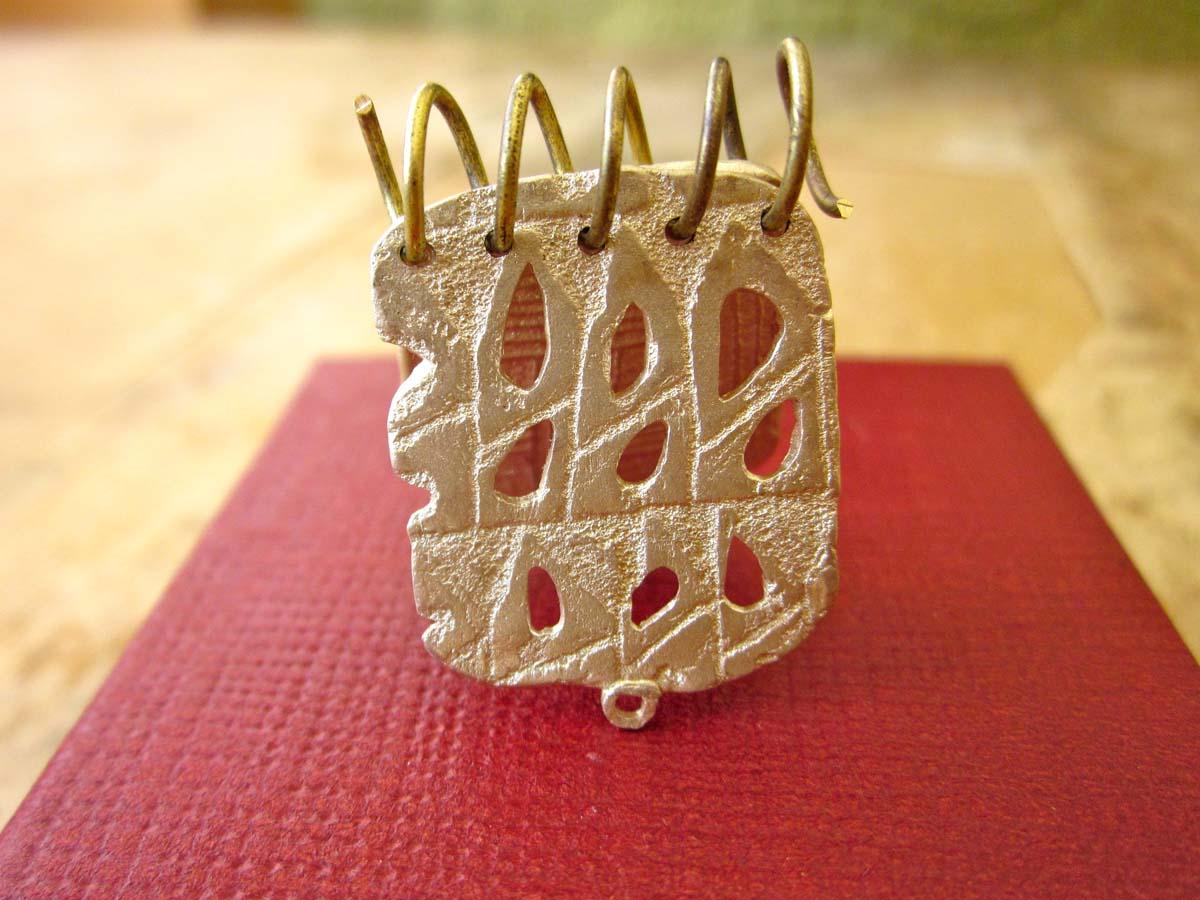
roll the hinge stock on small knitting needles (1.5 and 2mm) using a technique I’ve developed for making small diameter textured hinges.  I find it easier for making this scale hinge than drilling or extruding hinge stock.


I measure then cut the knuckles with a jeweler’s saw and a tube cutting jig.   The “fence” on the jig let’s you cut the same length again and again and cutting with a saw insures that you don’t crush the tiny hinge tube.  It’s not essential to have these tools but they do make the process easier.

I assemble the book charm, attaching the knuckles with very thick slip or lump clay.


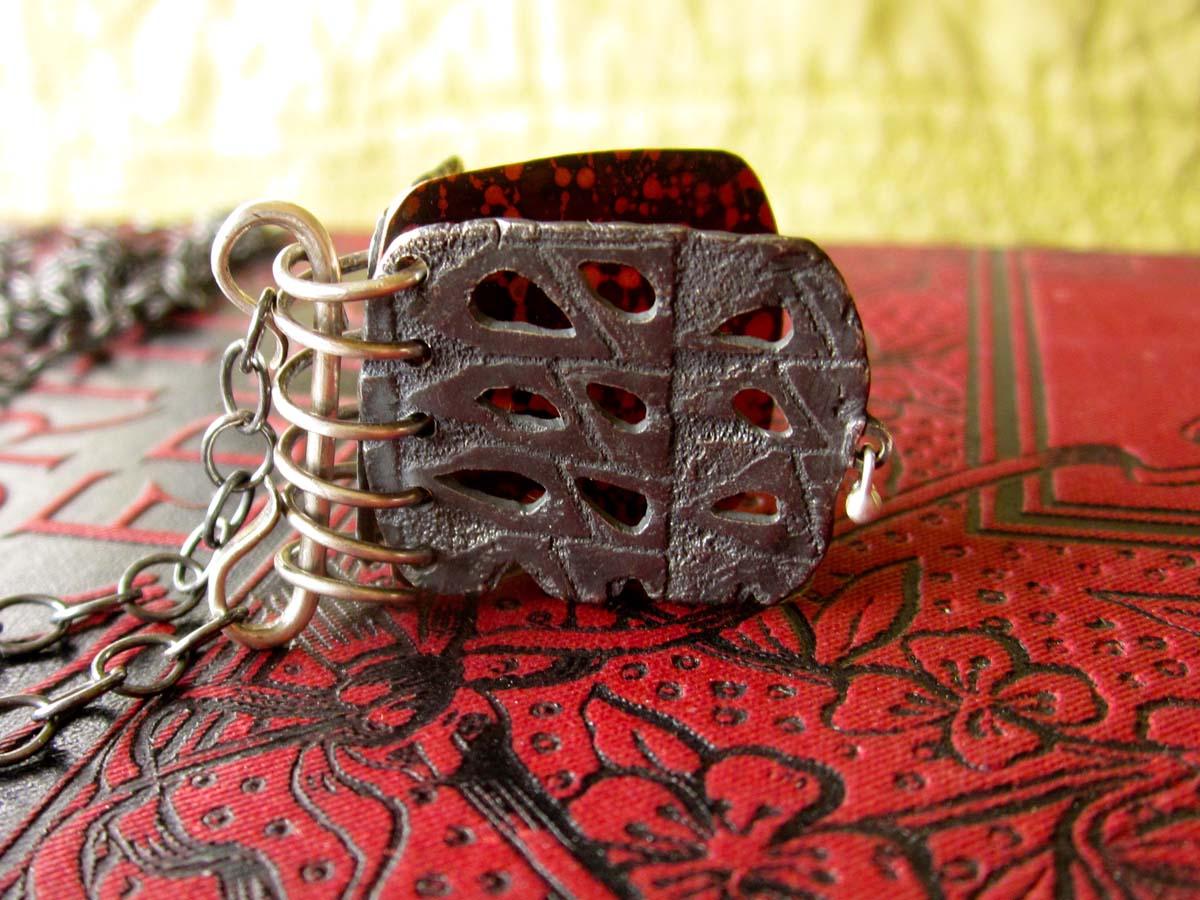
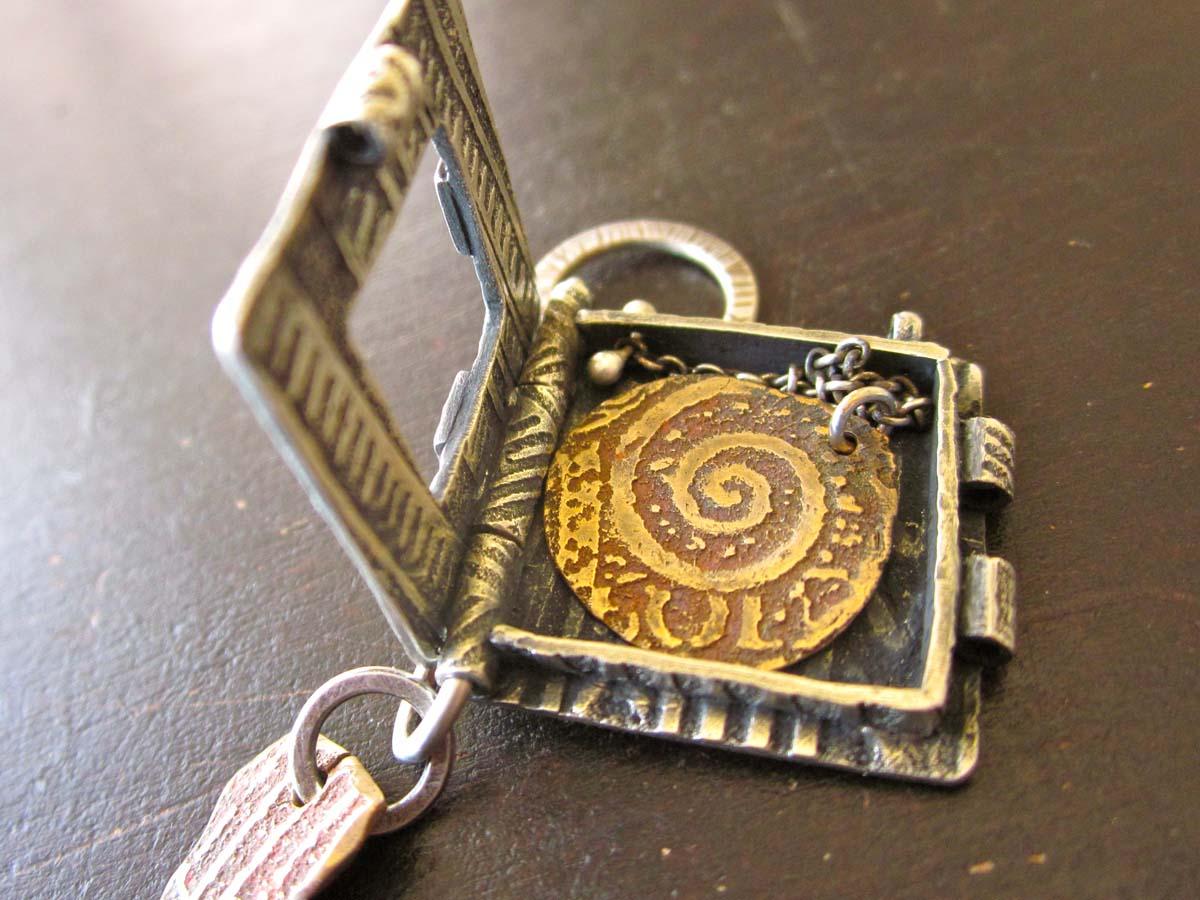
After two stage firing I tried various hinge pin solutions.  The one below has mica sandwiching a leaf skeleton riveted to its front cover.

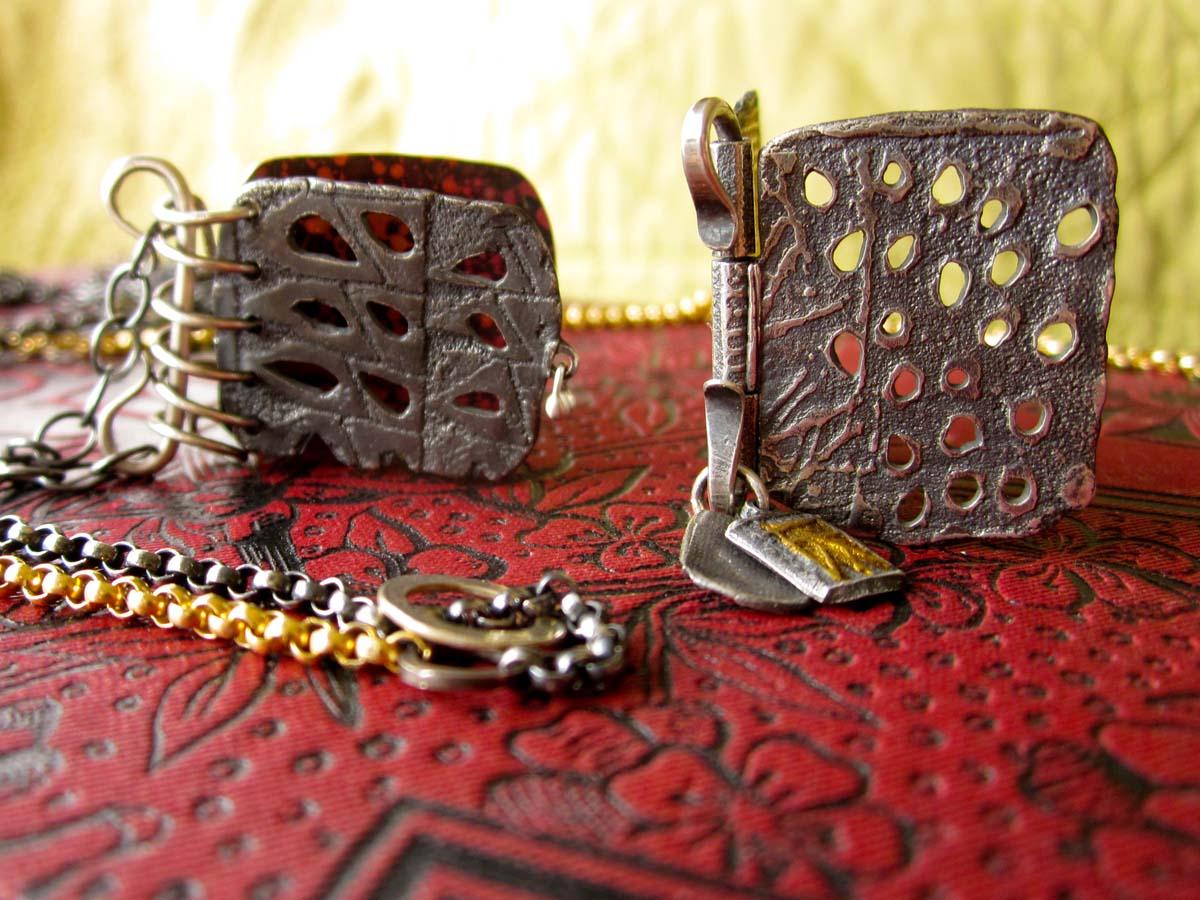
This one has keum-boo, patina, a decorative hinge pin and some dangles. 


These little hinged books are very satisfying to make and I have plans for many more.