

I believe the reason they say
15-20% is because there are so many factors affecting shrinkage: size,
thickness, firing conditions, kiln, etc.
I think if you want precisely
sized rings, the best course is the one Hattie Sanderson is taking. She is using her Hattie’s Patties (fire in
place ring inserts) to enforce size and also making stainless steel mesh
‘cages’ to fire the rings in so that the carbon doesn’t get between the ring
and the insert causing distortion.
Interestingly, a ring in a stainless steel cage is actually surrounded by air (in the
cage) and then the cage is surrounded by 8-10mm of carbon. You can read about Hattie’s method HERE.
Rings made in PMC Sterling
can be up-sized on a mandrel, as well.
 |
| diamond ring |
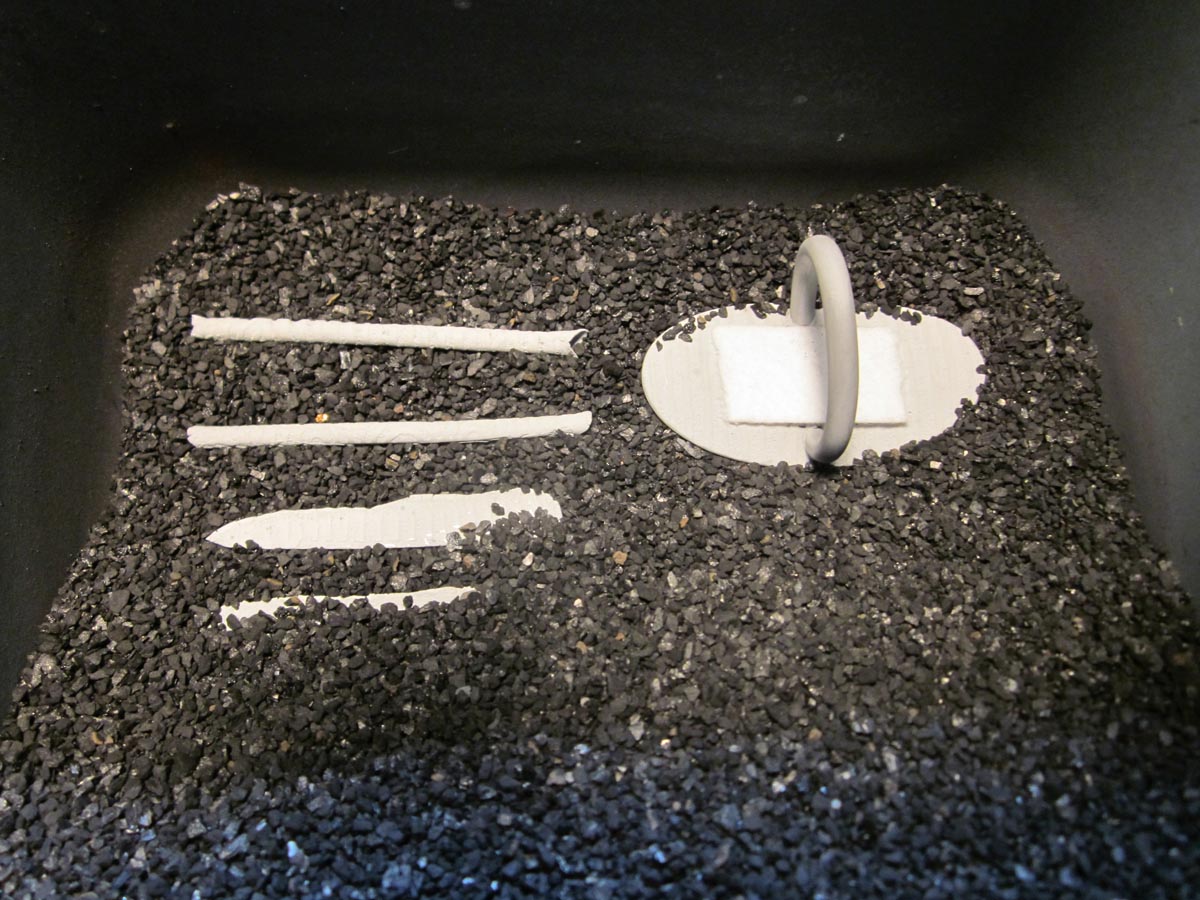
Sand paper is messier than whittling, so if I can whittle, I will. But as it's turned out, the whittling has taken me in a new design direction, a direction about which I am excited.

These are a group of washer rings (no seam) cut with a long blade and a template that let me avoid the business of making a seam. The one on the top left is the start of the Diamond ring. Once they are dry, I make a record of them with my copier.

Then I annotate the ring images, both so I can remake a specific ring and to reinforce the shrinkage.

These washer rings shrink less than the band rings. Washer rings shrink approximately 1-2 sizes. I don't know why, but I remember noting a similar phenomenon when I was testing BronzClay.
In the upper right corner is the Diamond Ring, whittled down with a scalpel, ready for setting the diamond.
The lower left is the start of the carved washer ring.

Blisters and Firing Modifications
I have had one piece of PMC Sterling blister in the past year. Since then (3 months ago) I have slowed the ramp down in the atmosphere stage; I've done 6 firings at 500F per hour and now 6 more at 800F per hour to 1000F (hold for 30 min). This is based on the theory that I may not have been burning the binder out sufficiently at the full ramp and that slowing the ramp down when air-firing may do so.
After cooling, I transfer the pieces to a steel container and put them on 10mm of carbon, then I add more carbon until it is 10mm above the top of the piece. I cover the steel container, put it into the kiln, on kiln feet so air can circulate, then fire full ramp to 1520F** and hold for 1 hour (or more if the piece is large or there is more than one piece).
I was able to sand and burnish the blisters away on the ring shank even though it was very badly blistered. The blisters were not empty inside; they were more like bulges so they could be pressed/abraded down. It's strong and fully sintered and looks fine.
**KIlns vary! It's important to know your kiln and how accurate the temperature is. Check the temperature, and do a few test pieces before you invest lots of time in a piece.

Shrinkage: This is an openwork ring, dry and ready to fire. It's size 11.5. When fresh, this ring was 12.5. Freshly fired the ring is size 9.5.

I have made many of these rings and have gotten this same shrinkage each time: 3 sizes from fresh to fired, 2 sizes from dry to fired.
It's important to note that because of the construction techniques I use, the dry to fired shrinkage (2 sizes) is the more accurate number.
These 2 open work rings have 24k gold keum-boo on the inside.


A bit more on shrinkage:
Flat pieces made of PMC Sterling are shrinking 15% consistently. This stitched ring was fired as a flat strip, then bent around a mandrel and stitched.

This picture describes how I checked the shrinkage. The graph paper shape is the template I used to cut the ring out so it's the size of the ring in fresh clay (and 4 cards thick). The similar shape with the purple lines running across it is the fired piece enlarged by 118% (enlarging by 118% is equal to 15% shrinkage). These two shapes being the same size proves a shrinkage rate of 15%.
[Here's why: 15% from 100% equals 85%, to find the size you need to end up at 100, you divide 100 by 85 and get 118%.]


These small disks were made by my apprentice, Erin M. Harris. They were rolled at two cards. She made a copy of the circles dry, ready to fire (the group on the right). The disks on the left are fired and enlarged by 118%. The two groups are equal in size proving that these small disks also shrank 15%.
The official shrinkage rate is 15-20% and as I've said, there has been some variation in my results. However, the shrinkage seems to be consistent by type: Washer rings are consistent with other washer rings, but vary from band rings, which are consistent among themselves.
Hattie Sanderson and Janet Alexander have both done a great deal of research on PMC Sterling in the past year. Janet keeps a blog HERE.
In this series of rings I am investigating shrinkage. I am also using a group of techniques that work with, rather than against, the natural tendency of metal clay to dry out; developing a natural edge, tearing, chipping and just turning the other cheek while it dries.
2 Tips for working with carbon:

Pouring the carbon from 1 container to another, in front of a window fan (blowing out), will keep your carbon dust free. I do this after every 2nd or 3rd firing.

6" plastic ruler is a great way to keep track of how much carbon you've poured: Pour 10mm of carbon as a base, place your piece on that and continue pouring the carbon until it's 10mm above your piece.
I have used
kiln paper to protect delicate openwork designs from carbon so that carbon granules don't wedge into open work and distort it.
